How to Convert a Photo to PDF on iPhone or iPad
Did you know that you can convert photos or images you have on your iPhone or iPad to PDF documents? This article demonstrates how you can do this using the Photos app. Sometimes, you may have to use a PDF for various reasons. For example, I had to convert a photo to PDF because I needed to submit the photo somewhere, and the only accepted format was PDF. The Photos app houses the photos or videos you took yourself or saved from other sources. If you check the image file extensions in Photos, they are usually PNG, GIF, JPEG or HEIF. From your iPhone or iPad, you can use the share/print function in Photos, the Files app or the Books app as a PDF converter. I describe the three methods below; you can choose whichever is easier for you.
Use the Print function to create a PDF from a photo
- Open the Photos app on iPhone or iPad.
- Locate the image you want to convert and tap to open it.
- Tap the Share button, which is a square icon with an arrow pointing up. On iPhone, this is located in the bottom-left corner of the screen. On iPad, the Share icon is found in the top-left corner of the screen.
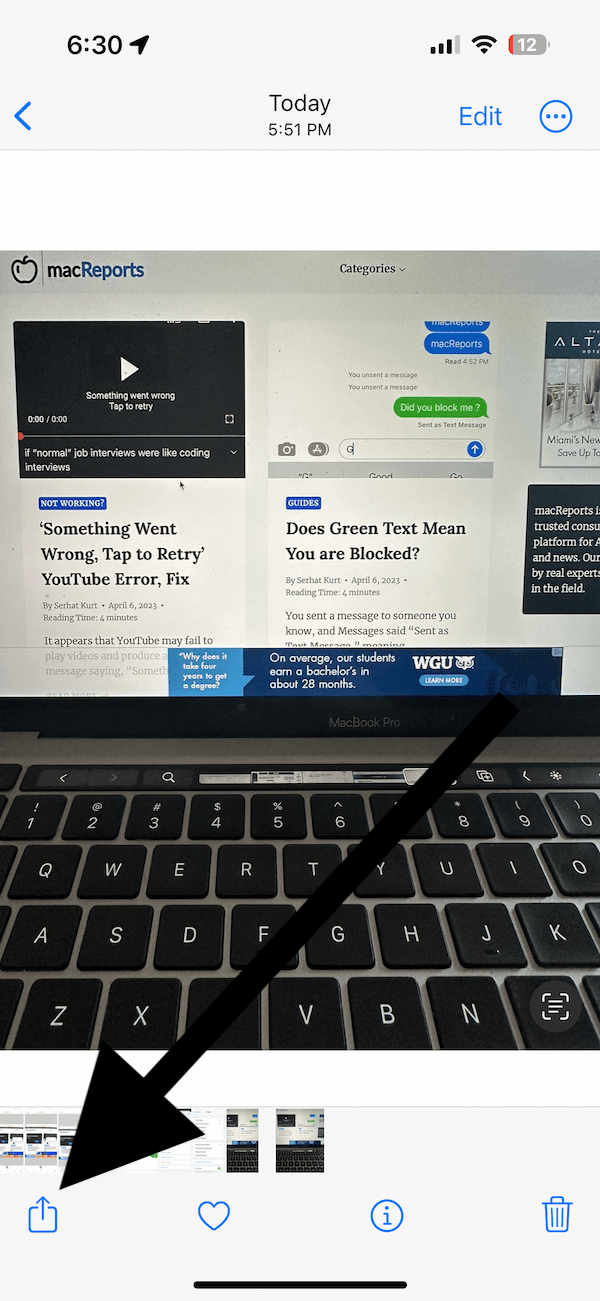
- Scroll down and tap Print.

- The Print options window will open. You will also see a Share button again right next to the text saying Print. Tap the Share button.
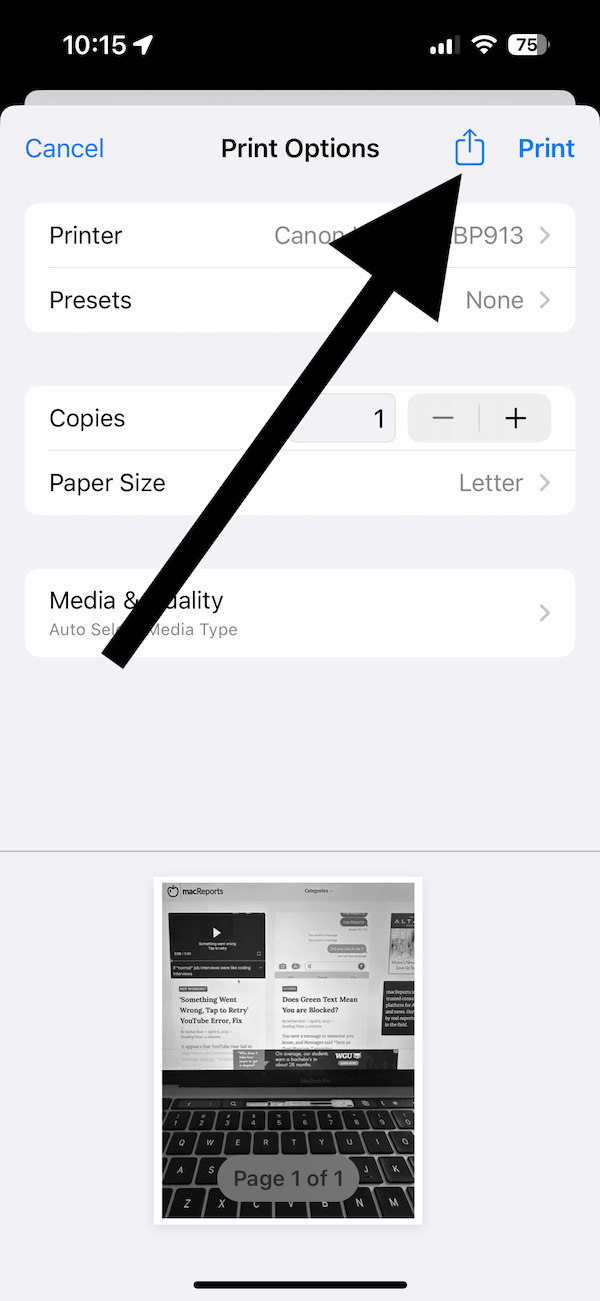
- This will convert the photo to PDF. You can then share your PDF file or save it to Files.

Use Files to turn a photo into a PDF
- Open the Photos app on your iPhone or iPad.
- Open the photo you want to turn into a PDF file.
- Tap the Share button.
- Select Save to Files and select a location in Files, then tap Save.

- Now open the Files app and go to the folder where you saved the image.
- Do not tap the image to open it. Tap and hold its thumbnail to display the shortcut menu.
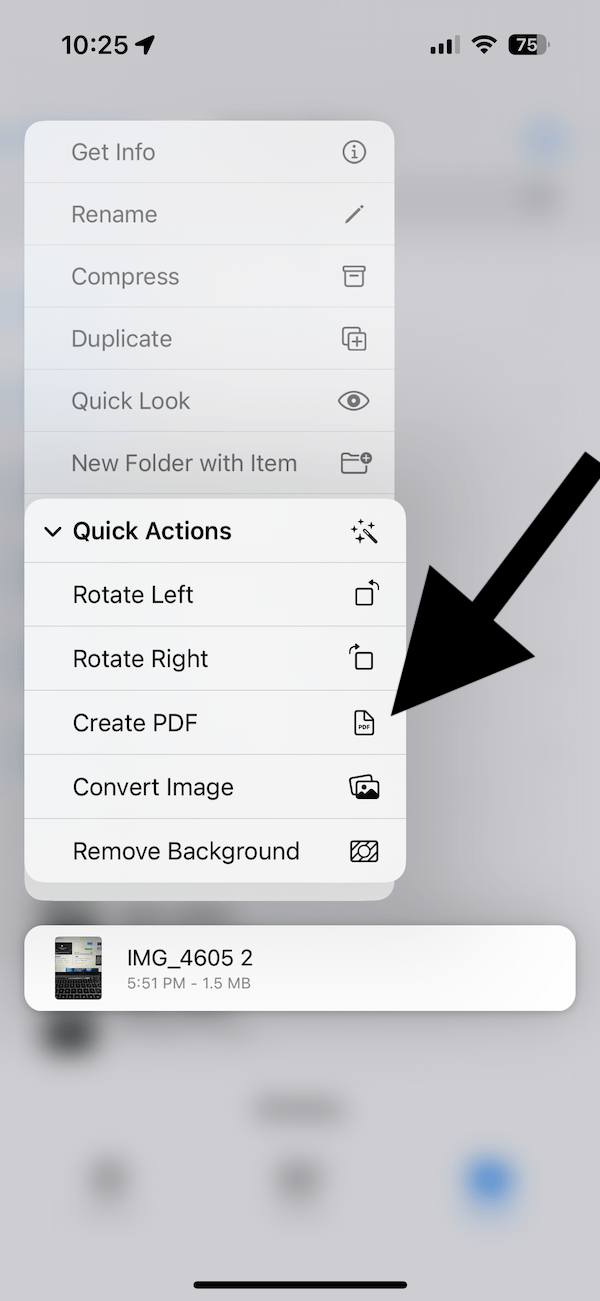
- Tap Quick Actions, then tap Create PDF. A PDF version of the image will be created and saved in the same location. You can then open or share it.
Use Books to convert a photo to PDF
- Open Photos.
- Locate the photo and open it.
- Tap the Share button and select Books. You may need to swipe left to find Books.
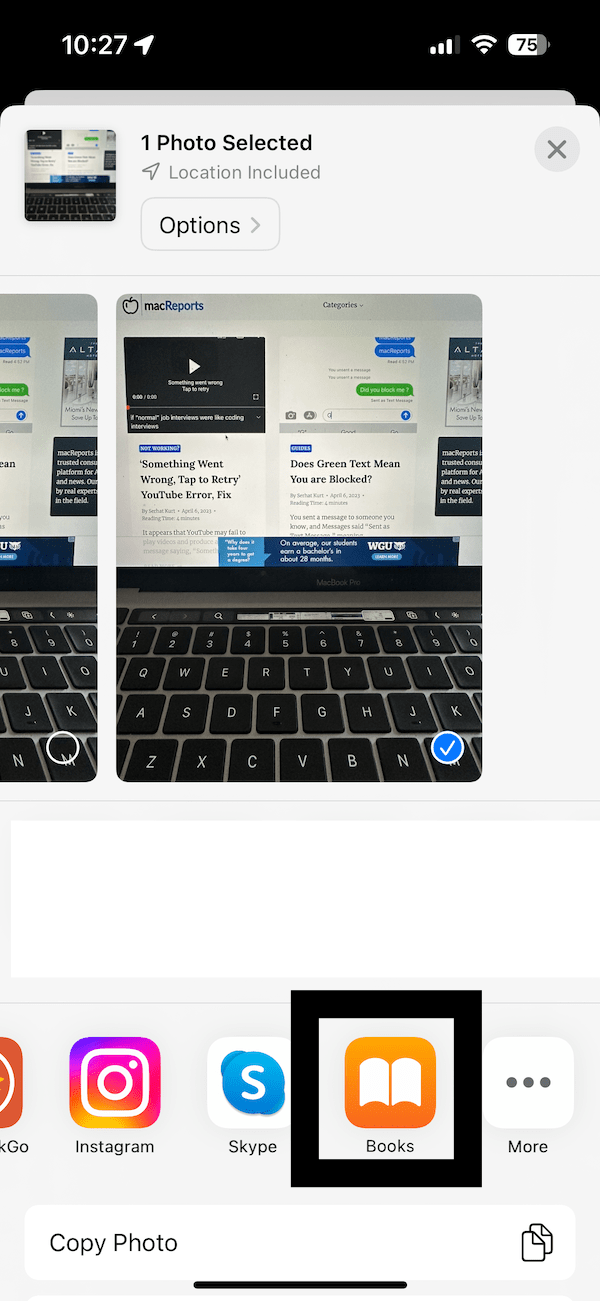
- The Books app will open with your image loaded.
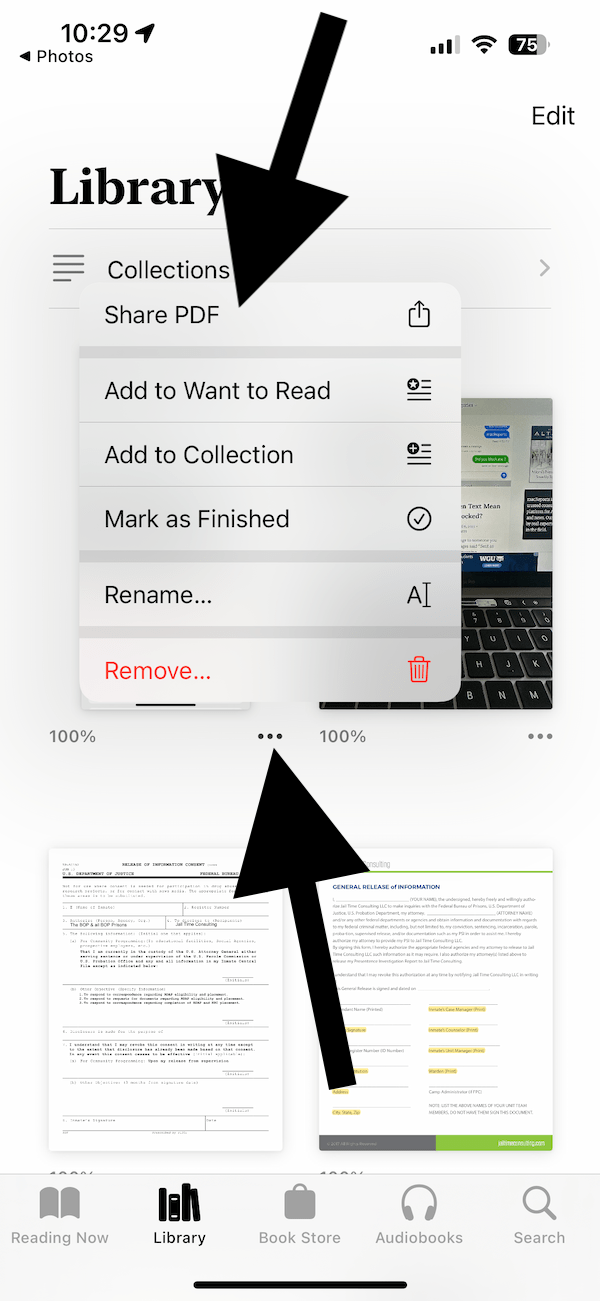
- Tap the more icon (…) (three dots) under the thumbnail of the photo.
- Tap Share PDF. Then you can share or save your PDF file.
There you have it. We’ve covered the ways you can turn any photo of yours into a PDF file. You will still have the original file as an image file. You can delete it if you want after your PDF file is created or keep both files.
Related articles
- How to Save an Entire Webpage as a PDF on iPhone or iPad
- How to Convert PDF to Word on Mac
- How to Reduce PDF Size on your Mac
- How to Combine PDF Files into a PDF on Mac for Free
- How to Delete or Rearrange PDF Pages using Preview
- How to Change the Default Screenshot File Format (PNG) to JPG, TIFF, GIF, BMP, or PDF in macOS
- How to Convert PDF to JPG on Mac
Dr. Serhat Kurt worked as a Senior Technology Director specializing in Apple solutions for small and medium-sized educational institutions. He holds a doctoral degree (or doctorate) from the University of Illinois at Urbana / Champaign and a master’s degree from Purdue University. He is a former faculty member. Here is his LinkedIn profile and Google Scholar profile. Email Serhat Kurt.


